Edible Gifts for Minimalists Who Don’t Want More “Stuff”

Edible Gifts for Minimalists Who Don’t Want More “Stuff”

No, not those kinds of edibles, but rather homemade consumable gifts straight from your kitchen, made with love. It can be hard to shop for the minimalist in your life. You want to give them a lovely gift, but you know they don’t want more stuff.  Edible gifts for minimalists are intentionally made to be used, they will be functional, enjoyable, and most importantly they won’t collect dust on a shelf. Also, edible gifts are a great opportunity to put your chef skills on full display, or just to pretend you have chef skills, because some of these are so easy! 

Edible Gifts for Minimalists:
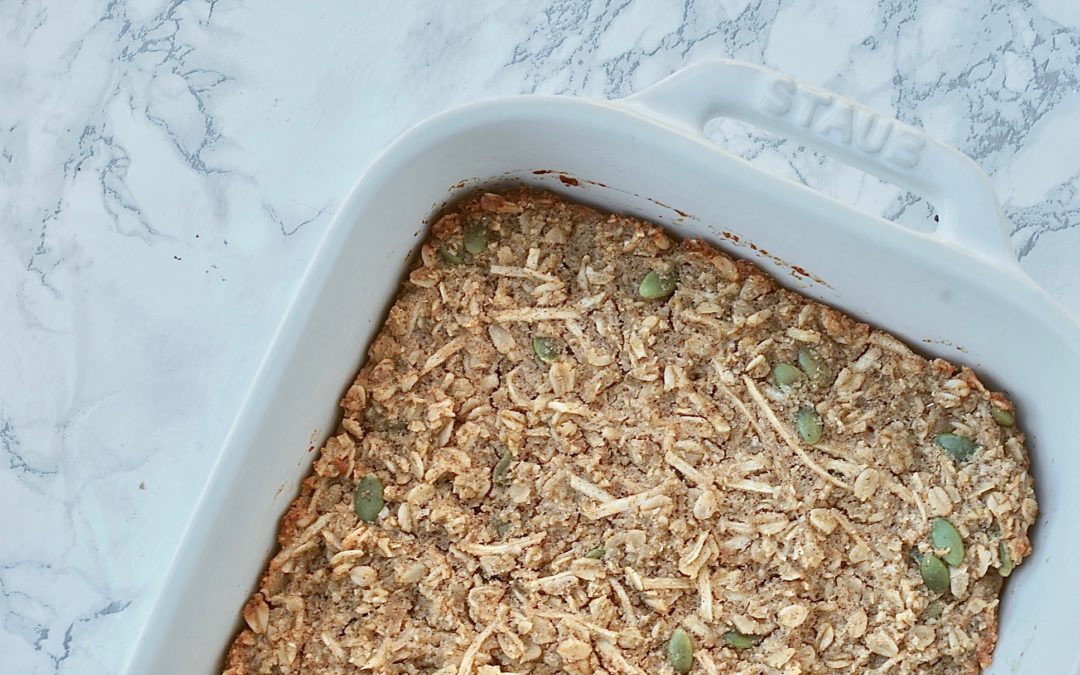
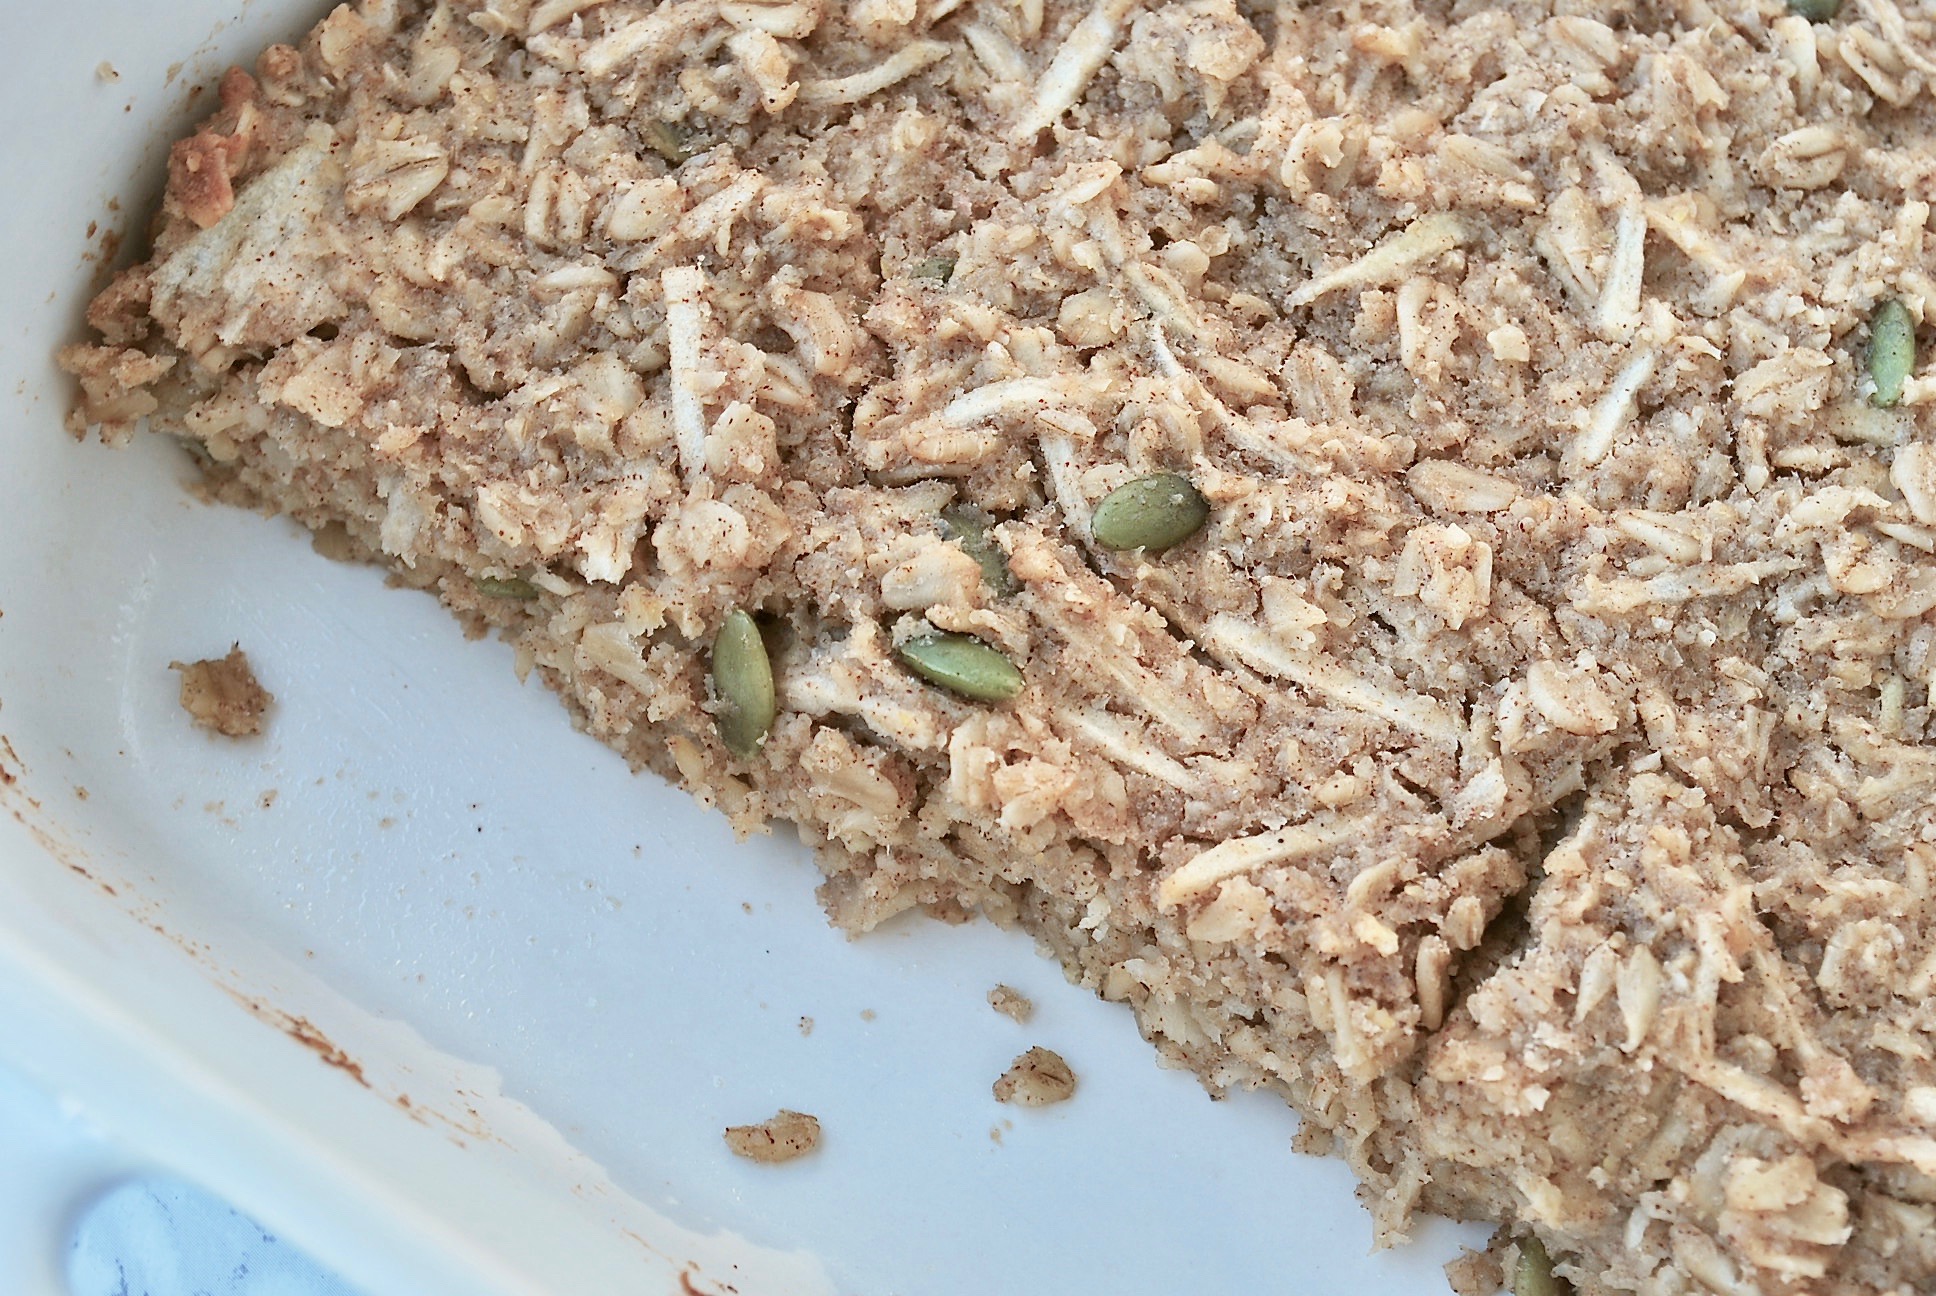
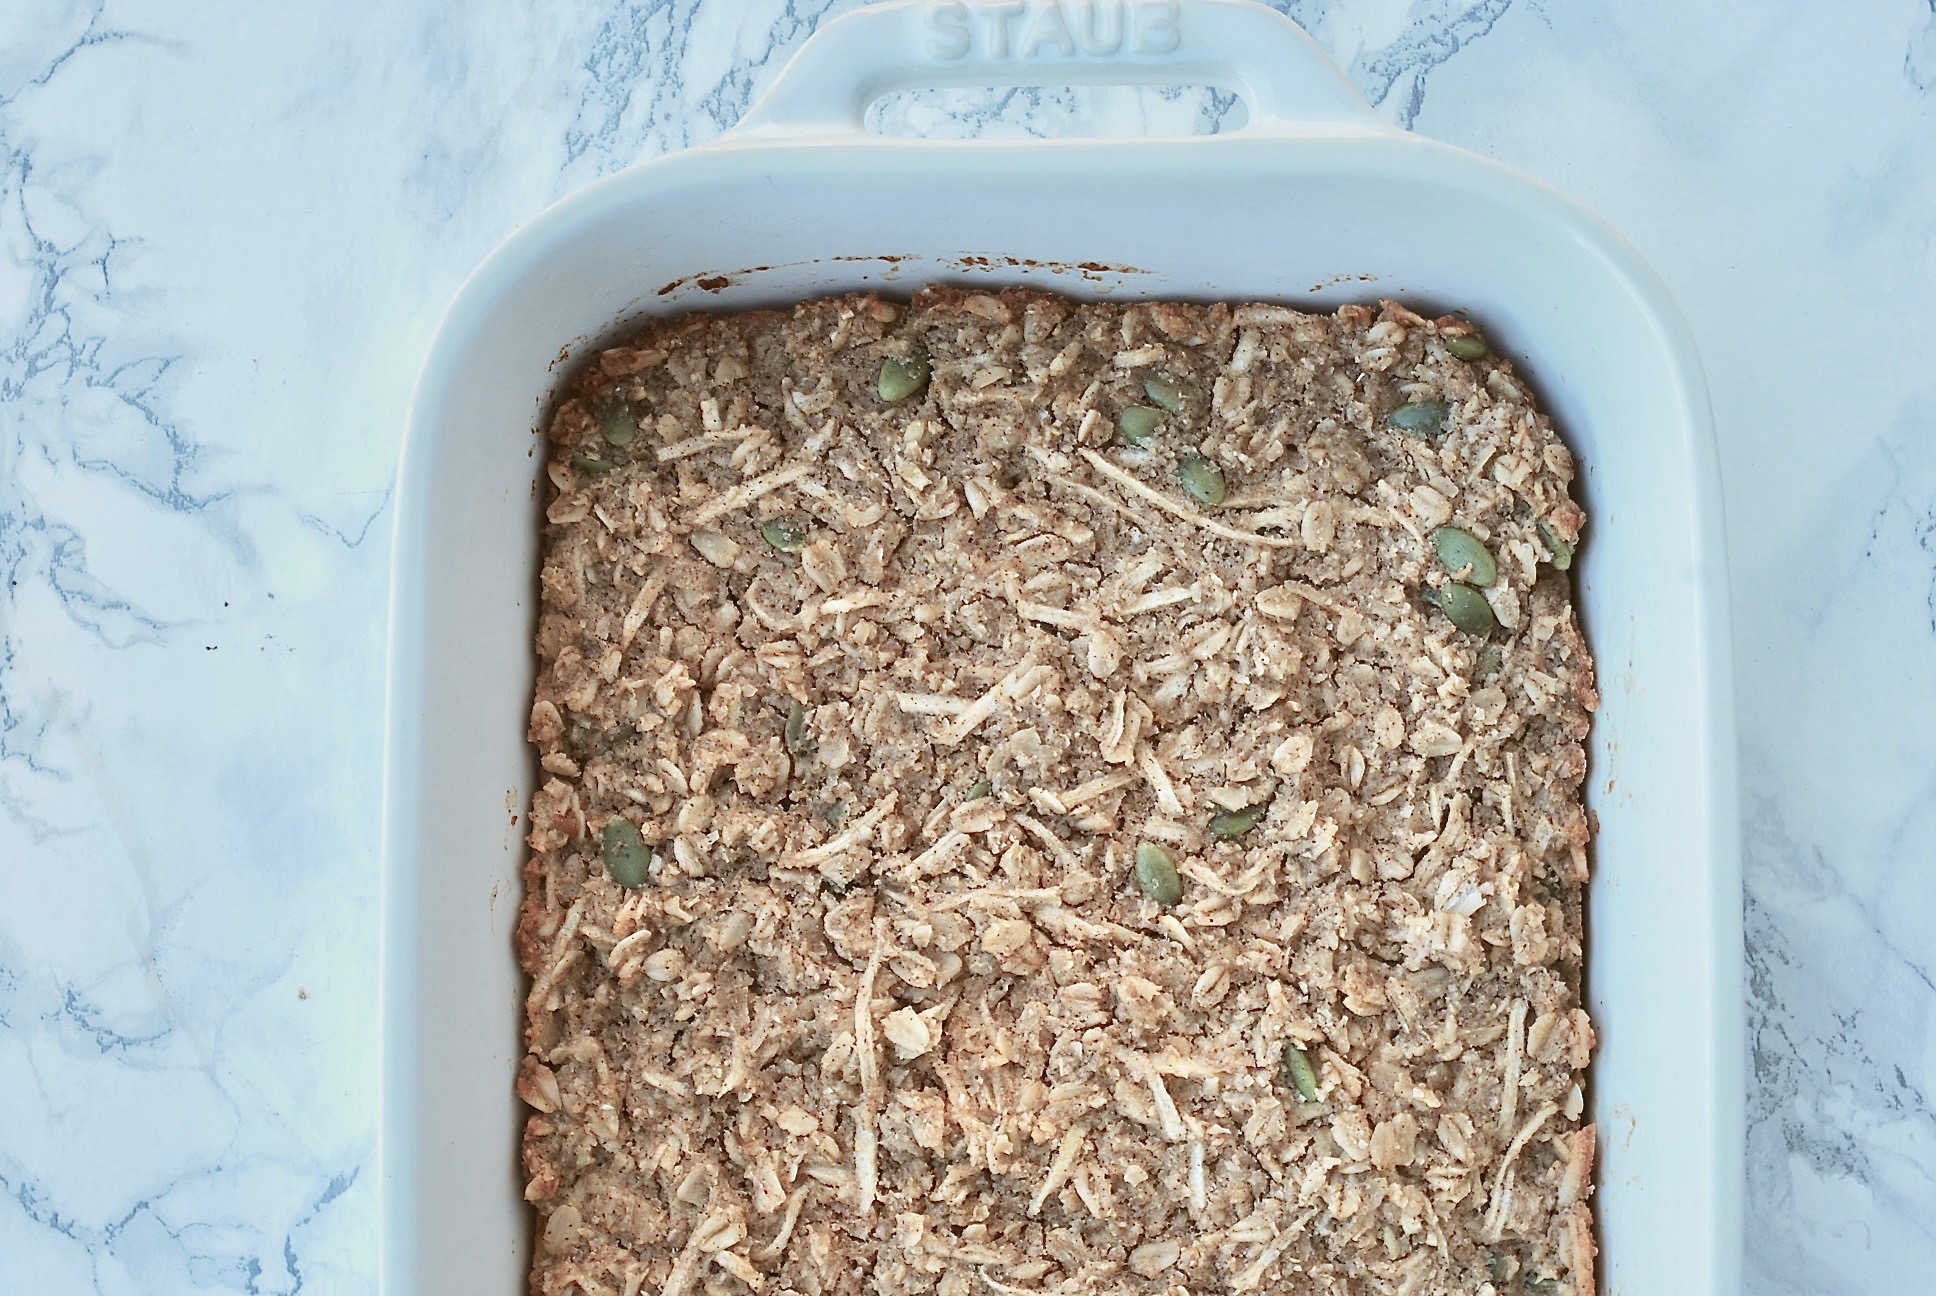
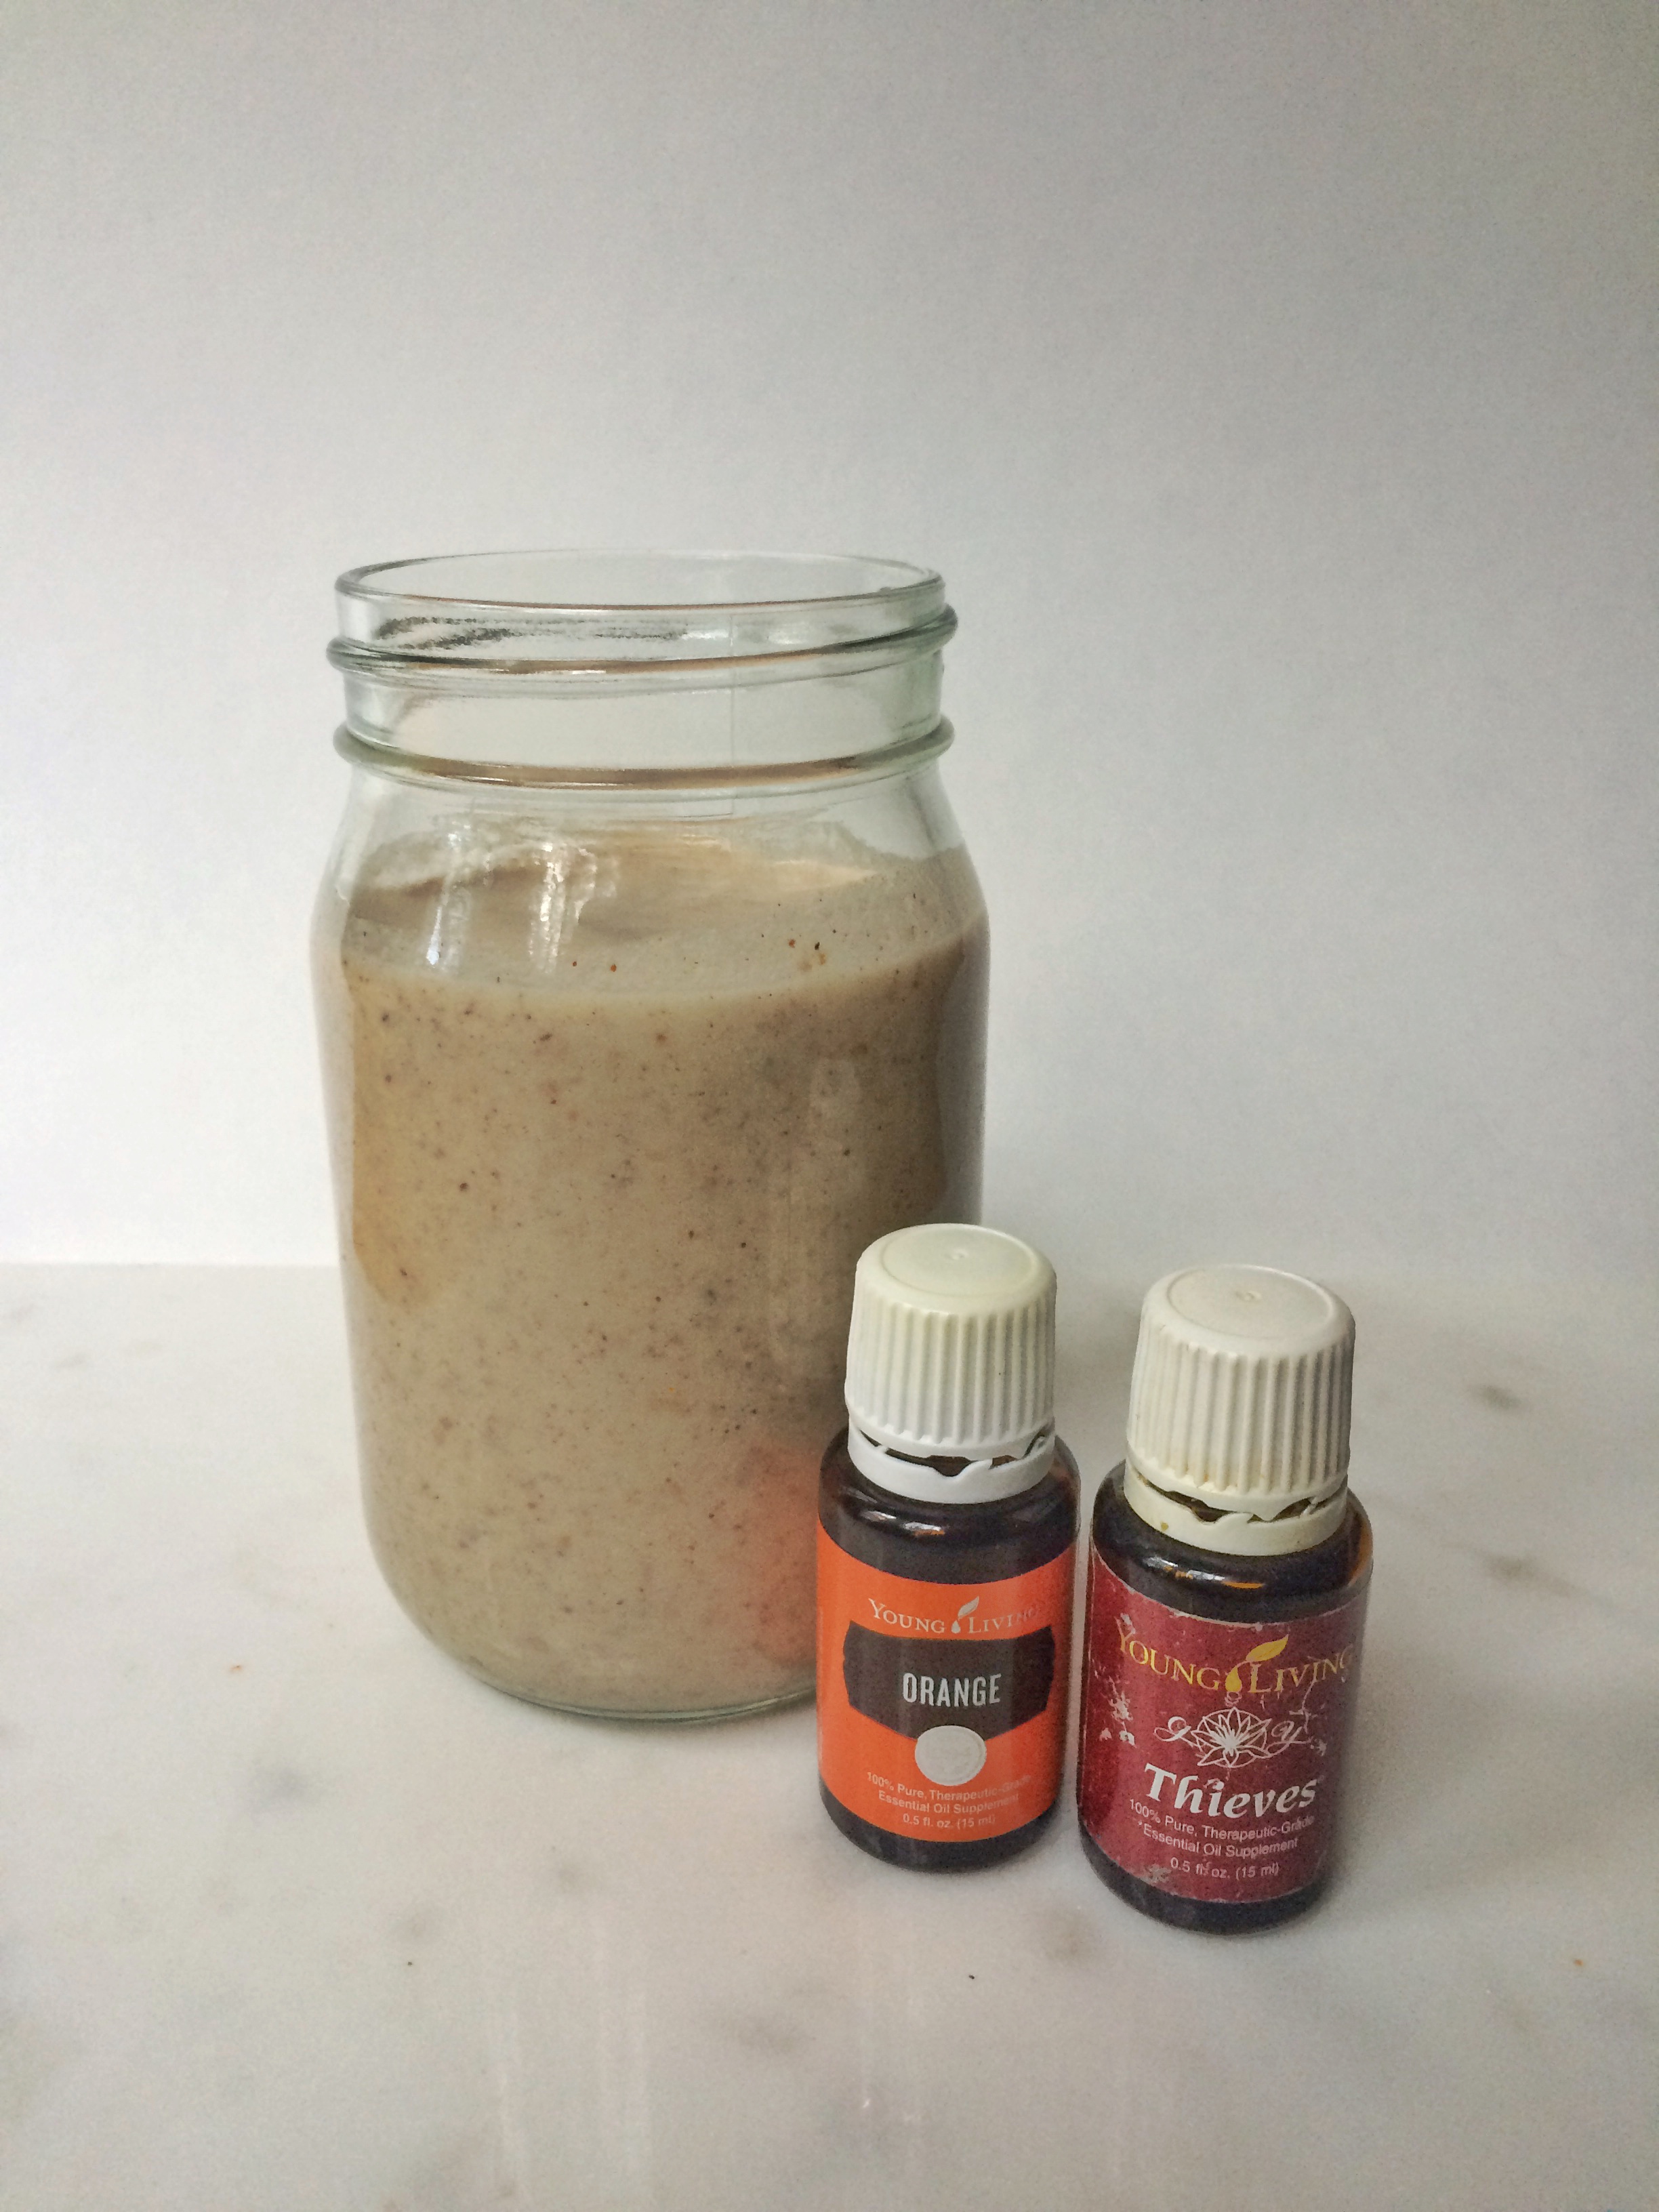
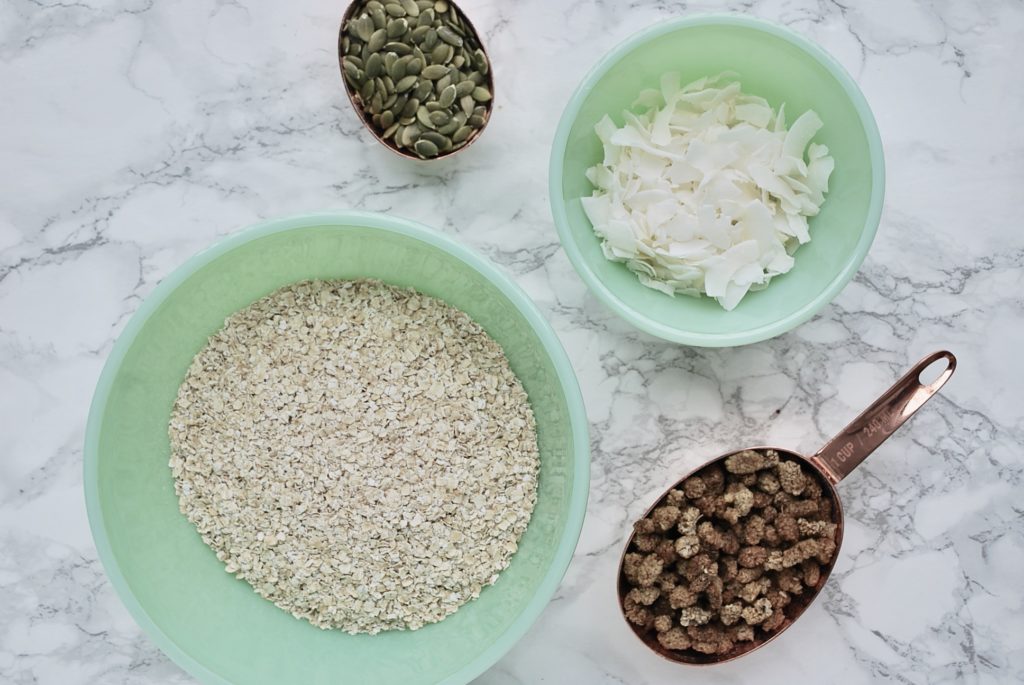
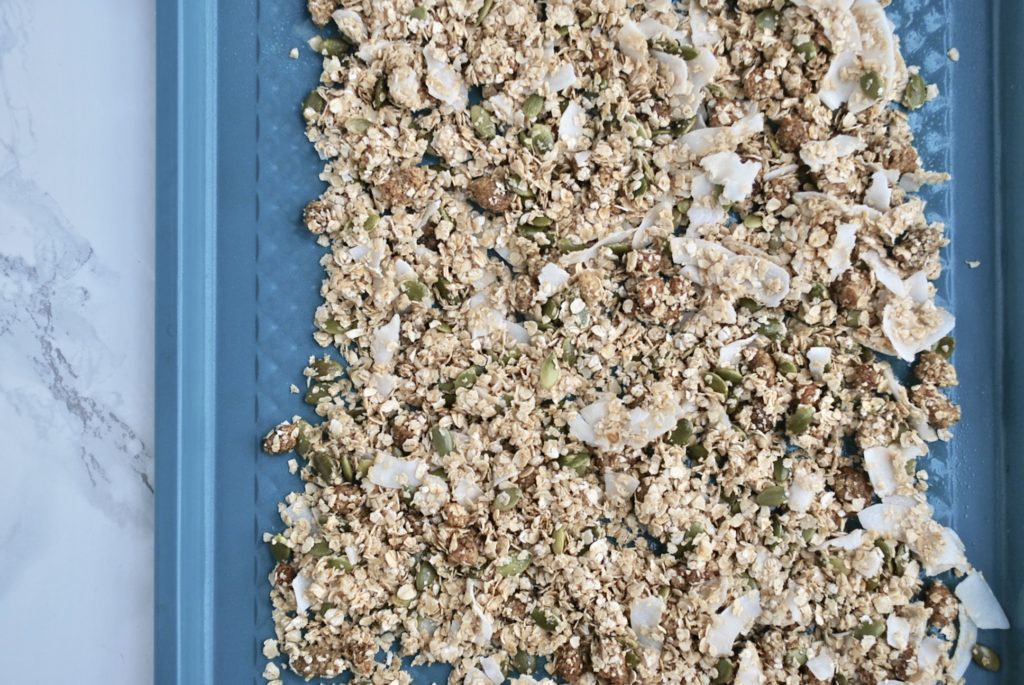
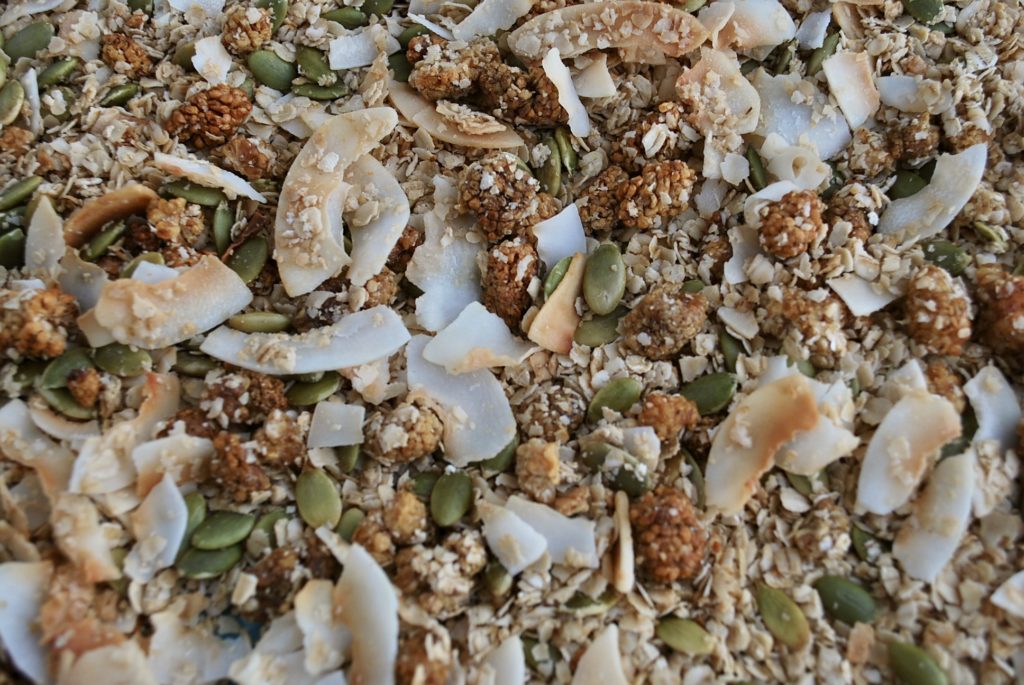
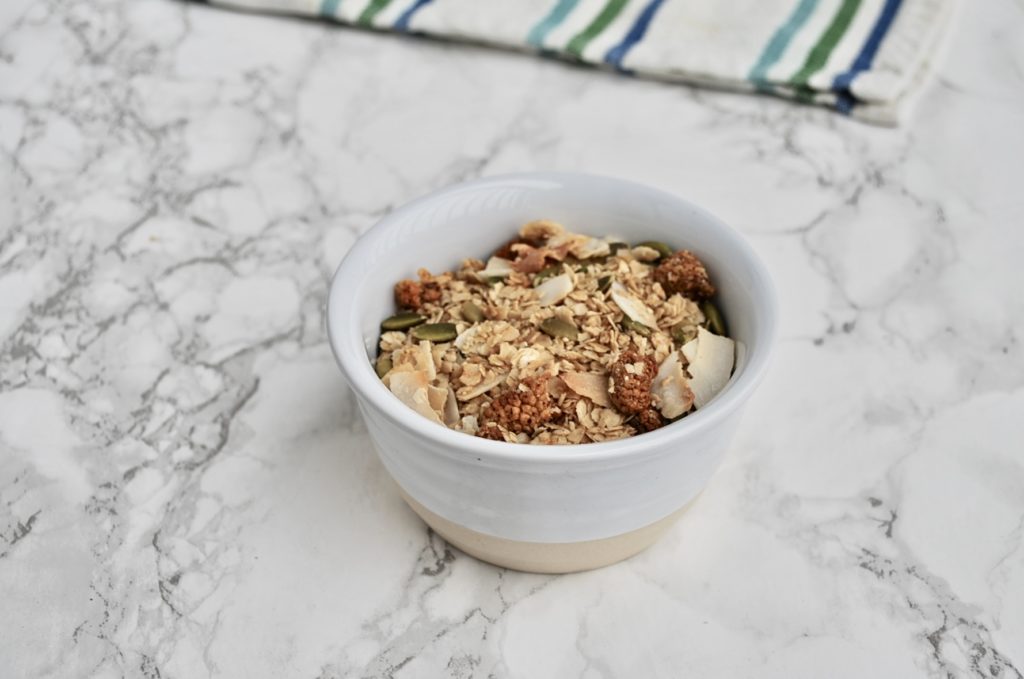
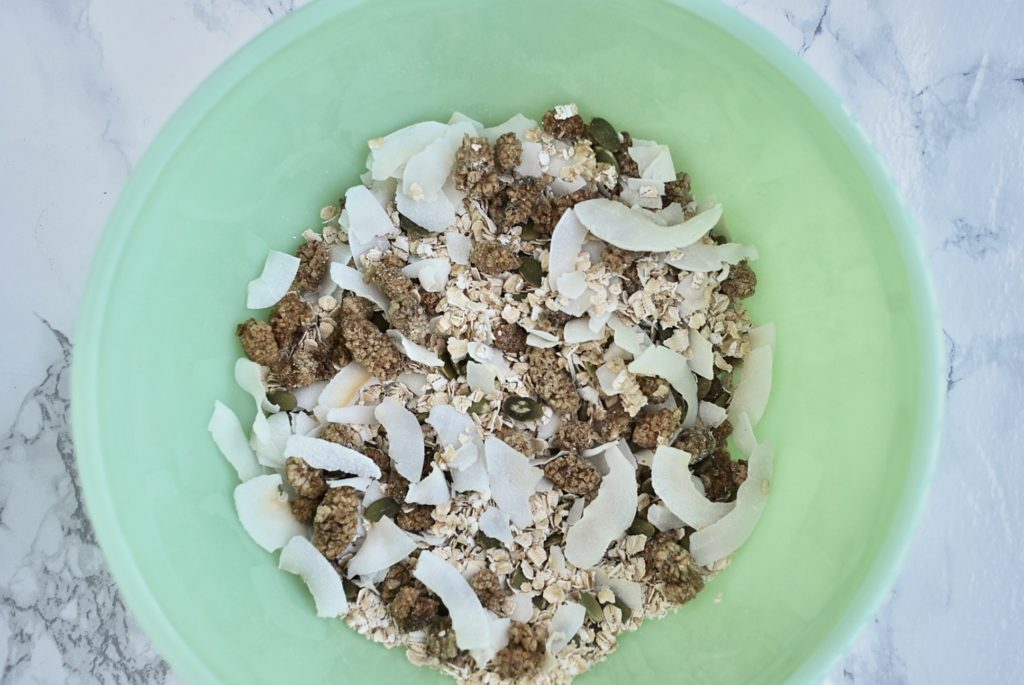
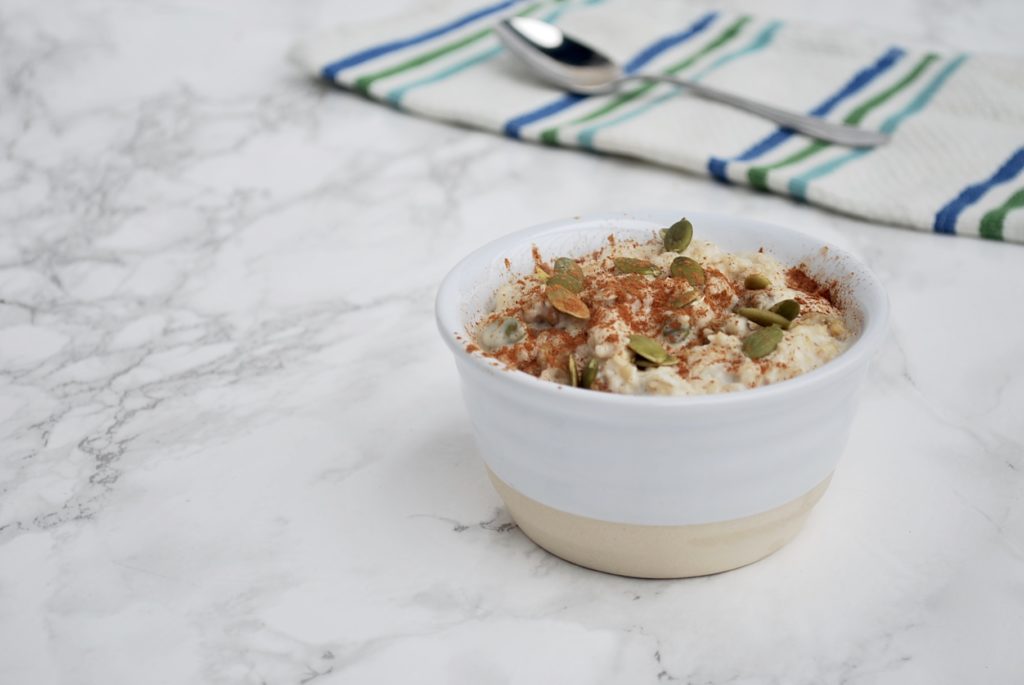
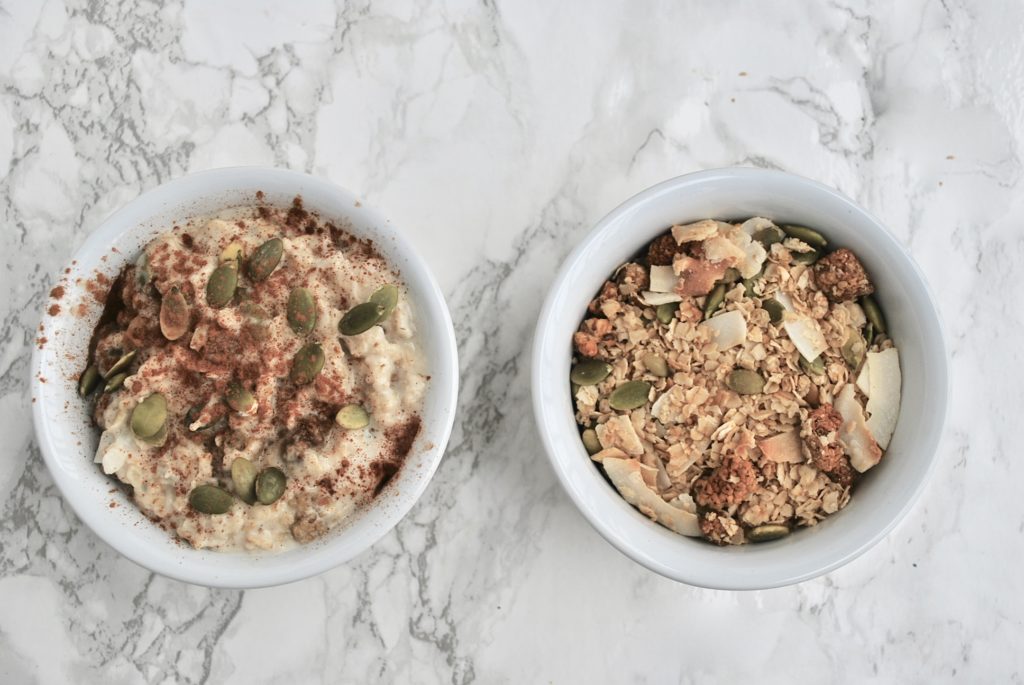
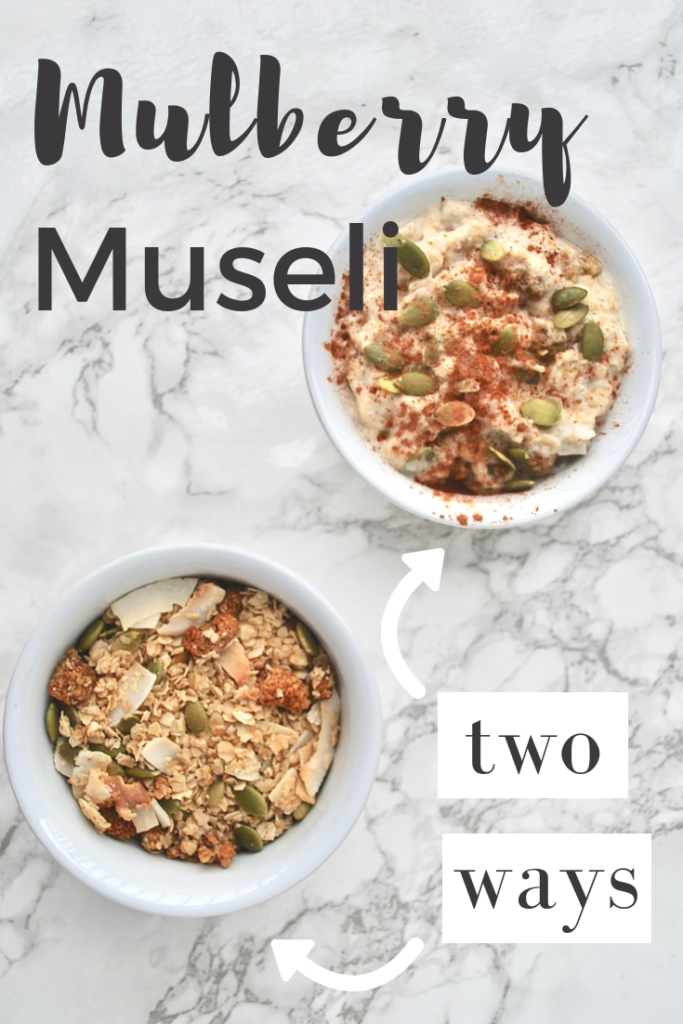
Homemade Granola

edible gift ideas

Homemade granola is super easy to make and can be made into a lovely presentation when put in a glass jar with a simple robbon and tag saying what it is. If you are looking for a simple granola recipe check out my Banana Walnut Granola recipe. 

Homemade Jam 

edible gift ideas

Jams, jellys, and marmalades require a little more effort but they can be so special, especially if you are using fruits you grew yourself. The easiest jam recipe I’ve ever done is this strawberry jam that uses chia seeds to create the jelly like consistency. It’s super healthy, but becuase of that it doesn’t keep for long (the downside of not using preservatives).  I also heard that Kate Middleton herself gifted the Queen some homemade jam for Christmas one year, so you are in great company. 

Infused Olive Oil

edible gift ideas

Infused olive oils are great becuase of how personalized you can make them. Get a large Costco size of olive oil and a few jars  and add herbs and spices depending on the recipeint. You can make a bunch at once so they are great to have for last minute on the go gifts for a hostess, your kids teacher, a hairdresser, dog walker, etc. I can’t think of anybody who wouldn’t appreciate this gift. 

Here are a few ideas of things you can add to a jar of olive oil:

  • roasted garlic cloves
  • rosemary sprigs
  • basil leaves
  • crushed chillis 
  • sliced lemon, orange, or blood orange
  • jalapenos
  • sun dried tomatoes
  • truffles (if you’re feeling fancy!)


Seasoned Salt

edible gift ideas

This is the gift that nobody realized they needed until they recieved it. Specialty salt is a unique treat that we don’t usually buy for ourselves, but it can absolutely transform a dish. Introduce this to your friends and you will be forever known as a culinary genious. 

Here’s how to make it:

  1. Buy good quality sea salt. My favorite is Malodon. 
  2. Add in whatever combination of dried herbs you like. Some ideas are: paprika, garlic powder, chili powder, dried rosemary, dried thyme, dried basil, onion powder, the list is as endless as your spice cabinet. 
  3. Put your salt mixture in a nice jar with a bow and a little tag that says what is in it. 

Soup-in-a-Jar Kit

edible gift ideas

I love recieving these types of gifts becuase a soup-in-a-jar kit is a great thing to have on hand on a cold winter evening when you don’t feel like cooking. I consider it a luxury to not have to think about what I am making or go to the store and prepare dinner. These gifts are especially great for busy parents who would welcome a night off from making dinner, especially during the holiday season where days can be a bit hectic. 

Here’s is a very general and flexible blueprint so you can make it unique to the recipeient. 

Ingredients: 

  • 1-2 cup of a small pasta
  • 2-3 cups of some type of dried beans (go for 2-3 types so the layers look nice and colorful)
  • ¼ cup dried parsley flakes
  • 1/3 cup dried diced onion
  • 1 tsp. dried basil
  • 1 tsp. dried oregano
  • 1 tsp. dried rosemary
  • ½ tsp. garlic powder
  • ¼ tsp. red pepper flakes
  • ½ tsp. black pepper

Directions: First layer is the pasta, then put all the spices in a plastic baggie and layer that on top of the pasta, next layer the different types of dried beans in the jar one on top of another. Remember to include some directions which should say to add the beans and spices to water or broth and boil until the beans are cooked through, then add the pasta at the very end for 5-10 minutes. 

3 Simple Fall Breakfasts

3 Simple Fall Breakfasts

Autumn is one of my favorite times of year to cook. Fall flavors tend to be sweet and savory with lots of warm spices. The smells and tastes that are so indicative of this season evoke feelings of comfort and nostalgia.  As much as I enjoy the change from summer to a fall wardrobe, I especially love the shift in seasonal foods in flavors we experience this time of year. I specifically created these 3 simple fall breakfasts with very few ingredients, and to be flexible so they can be enjoyed by all, despite dietary restrictions or not having all of the ingredients.

Sautéed apples

This is a really quick and simple breakfast that makes your house smell like Yankee Candle. It’s one of my personal favorites on cold mornings, when I need something to warm me up. It also makes a great dessert because it tastes like apple pie!

Ingredients

  • I apple
  • cinnamon, nutmeg, or pumpkin pie spice

Directions

  • Chop the apple into bite size pieces
  • sauté in a pan on medium heat for about 5 minutes with some coconut oil and any combination of the above spices (no measuring necessary), occasionally stirring.

sauteed apples 1

Pumpkin cinnamon oatmeal:

Oatmeal tends to get a reputation as boring and bland. Well I’m determined to change that! There are endless ways to spice up a traditional hot breakfast. The best thing is that you don’t need to measure anything! I purposely don’t put measurements on any of the ingredients here because you should decide how much of each ingredient you want.

Ingredients:

  • Irish steel cut oats
  • cinnamon
  • maple syrup
  • pumpkin spice
  • walnuts
  • slivered almonds
  • almond milk
  • pumpkin seeds

Directions:

  • Cook steel cut Irish oats (or instant oats if you prefer).
  • Add in cinnamon, maple syrup, pumpkin spice, walnuts, slivered almonds, pumpkin seeds, almond milk.

dsc_0032

Orange spice Smoothie

This cooler breakfast is great for early autumn when the mornings are still mild. The flavors feel cozy and fallish, without it being too hot or heavy.

Ingredients

  • Vanilla protein powder
  • water or unsweetened almond milk,
  • cinnamon and/or pumpkin pie spice.
  • 1-2 drops orange essential oil and/or Thieves essential oil (optional but it makes it so good!)
  • almond butter
  • 1/2 banana

Directions

  • Just put it all in a blender with some ice and you’re good to go!

FullSizeRender-53

Check out some more of my favorite fall breakfasts:

Healthy Pumpkin Spice Latte

Paleo Apple Cinnamon “Oatmeal”

Irish Steel Cut Oatmeal with Apples

Orange Spice Date Balls

Quick Winter Breakfasts: Mulberry Museli 2 Ways

Quick Winter Breakfasts: Mulberry Museli 2 Ways

Once it starts getting colder in get mornings I turn to making different variations of oats as a simple, healthy weekday breakfast. And OMG it’s so freakin’ easy when you make it ahead! This simplified my morning routine tremendously. I’m talking instant breakfast every morning you can make before your eyes are fully open #I’mnotamorningperson.

The beauty is that you can make infinite variations based on the different ways you accessorize your oats and how you prepare it. Starting with a base of quick oats you can add all types of of nuts, seeds, dried fruit, and spices that please your palate.

Today I want to share with you two ways you can make this delicious and healthy breakfast.

Here’s where you start…

First, decide what you are going to combine with your oats, the options are endless but here are some of my favorites:

Nuts: Walnuts, Almonds, Cashews, Pecans, and Brazil Nuts

Seeds: Chia seeds, Pumpkin Seeds, Sesame seeds, Hemp seeds, and Flax seeds.

Dried Fruit: Raisins, cranberries mulberries, banana chips, dehydrated blueberries/strawberries/raspberries, and mangos.

Spices: Nutmeg, Cinnamon, Clove, Cardamom

Note: The recipe I am about to share with you is by no means the one you have to make if you are following this recipe. You can swap out any of the ingredients I use with your choice of the above options. Use what you already have, and use what you like! This recipe is really interchangeable. 

You may also decide how much of each one to put in. There’s really no key ratio, it just depends on how much you want. I like to do even ratios of the above ingredients, just because I’m OCD like that.

Once you make a big batch of this and store it in an air tight container you have breakfast ready every day!


Ingredients:

  • 2 cups quick oats
  • 1/2 cup pumpkin seeds
  • 1 cup dried mulberries (warning, they are very sweet, so use less if you’re not into sweet oatmeal)
  • 1 cup coconut flakes
  • 1/4-1/2 cup maple syrup (For Recipe #1 only)
  • 1/4 cup melted coconut oil (For Recipe #1 only)

Recipe #1: Winter Mulberry Granola

If you are a cereal person, this is for you. This method involves slightly roasting your oat mixture to create a type of granola which will mix well with the milk or nut milk of your choice.

Directions: Preheat the oven to 350 degrees. Mix all the dry ingredients listed above into a bowl. Slowly drizzle in the melted coconut oil and maple syrup, stirring until everything is evenly coated. If you don’t want your granola to be too sweet, then go lighter on the maple syrup. On a lightly sprayed baking sheet, evenly spread the oat mixture and bake in the oven for 10 minutes.

Once it’s roasted for about 10 minutes (careful not to burn it) it should make your kitchen smell AMAZING and will have a lovely golden color to it.

How to serve: Take 1/3-1/2 of a cup of the granola and serve it with almond milk like a cereal, or over yogurt. I have an old Cashew Milk recipe from the wee early days of this blog. Check it out if you want to see how my photography skills have improved! It’s a good laugh.


Recipe #2: Warm Mulberry Museli

Directions: Incorporate all the dry ingredients from the above ingredient list (you do not need the maple syrup or coconut oil for this one). Store in an air tight container.

Yep that’s it. The beauty of this recipe is that it’s probably the fastest and easiest thing you can make. No baking required!

How to serve: HOT- Take 1/3-1/2 of a cup of the mixture and combine with 3/4 of a cup of water or milk on the stove on medium heat for about 2-5 minutes until it resembles oatmeal. COLD- Take 1/3-1/2 of a cup of the mixture and pour milk over it like a cereal.


However you decide to make this, know there are so many different variations available to you. So make it your own, don’t go crazy buying ingredients you don’t want or need, and let your palate be your guide!

Fun Fact: The difference between a granola and a museli is that while granola is baked with a sweetener and oil to bind the ingredients together museli is an unbaked cereal. Granola is usually served cold with milk or yogurt, while museli can be served cold like a cereal, or hot like an oatmeal.

Like it? PIN IT!

More posts to inspire you…

Guided Meditations to Transition into Fall

Guided Meditations to Transition into Fall

My daily meditations fell off a cliff when the pandemic happened. In a time where meditaiton was most needed I was looking for comfort and grounding in other things like food and Netflix binges, but now that a new season is upon us it’s a perfect time to start a new...

New Self Care Routines to Adopt For Fall

New Self Care Routines to Adopt For Fall

Let's talk about some of the new self-care routines I'm working to adopt for fall this year. Many moons ago I created self-care guides that were based on the seasons. Physical, mental, emotional, and energetic properties of each season vary so widely that I thought my...

Eco Friendly Gift Guide for Kids

Eco Friendly Gift Guide for Kids

In this eco friendly gift guide for kids I've searched through all of my favorite brands for the perfect items. I know as busy parents during the holiday season you don't have time to do all the research on the toys you get for your kids, but you also don't want more...

The Healthy Holiday Platter

The Healthy Holiday Platter

OK friends, I’ll make this super short but OH SO SWEET!

It’s the holidays, which means either you’re hosting people, or you’re going somewhere. For those who are always staying mindful of how they treat their bodies this time of year can be riddled with land mines.

But fear not! I’ve put together a super simple Healthy Holiday Platter that required NO COOKING WHATSOEVER! Can you sense my excitement over this?

I recently hosted a Christmas Vacation viewing party for some friends who had never seen the movie before (Gasp! *clutches pearls*). My goal was to snack all day on the healthiest, yet still tasty, items I could think of.

It was a huge success!

Here’s what you need:

  • Guacamole
  • Rainbow carrots (because they are so pretty)
  • Olive Tempenade
  • Rice Crackers (or any crackers you prefer)
  • Greek Olives
  • Grapes
  • Trail Mix

I’ve found that all these foods are easily snackable, don’t need utensils, and don’t make much of a mess. While at the same time they have vitamins, minerals, fiber, healthy fat, and a little bit of sweetness so you can snack all day and not feel guilty, or totally sick.

Wishing you and your family a wonderful and MINDFUL Holiday season!

xo,

LIKE IT? PIN IT!

More posts to inspire you…

Guided Meditations to Transition into Fall

Guided Meditations to Transition into Fall

My daily meditations fell off a cliff when the pandemic happened. In a time where meditaiton was most needed I was looking for comfort and grounding in other things like food and Netflix binges, but now that a new season is upon us it’s a perfect time to start a new...

New Self Care Routines to Adopt For Fall

New Self Care Routines to Adopt For Fall

Let's talk about some of the new self-care routines I'm working to adopt for fall this year. Many moons ago I created self-care guides that were based on the seasons. Physical, mental, emotional, and energetic properties of each season vary so widely that I thought my...

Eco Friendly Gift Guide for Kids

Eco Friendly Gift Guide for Kids

In this eco friendly gift guide for kids I've searched through all of my favorite brands for the perfect items. I know as busy parents during the holiday season you don't have time to do all the research on the toys you get for your kids, but you also don't want more...

Apple Pumpkin Seed To-Go Bars

Apple Pumpkin Seed To-Go Bars

Having these apple pumpkin seed to-to bars on hand during the week made my life so much easier. Work has been picking up, and I’ve been leaving the house around 7:30 AM each morning. As the person who hits snooze till the last possible second, having something I could just grab out of the fridge and eat on my way to work was a life saver. Though I don’t recommend eating on the go, sometimes we have to, and when we do it’s best to be prepared.

Since it’s now Autumn, we want all the pumpkin and/or apple flavored everything right? These apple pumpkin seed to-go bars are my new favorite, and I will be making them every Sunday in preparation for the week ahead. They are healthy enough for breakfast, but they have just the right amount of sweetness to satisfy my after dinner sugar cravings without reaching for cookies or ice cream.

This is especially helpful for working women (like me) or busy moms who feel like they have to choose between heating healthy and having quick solutions on a hectic schedule. It’s my goal to make it easier!

And for all of you who don’t do grains, check out a my recipe Paleo Apple Cinnamon “Oatmeal” I did last year that feels like oatmeal, but it’s not!

Ingredients:

  • 2 1/2 cups quick rolled oats
  • 1 1/2 tsp cinnamon
  • 1 apple (I like granny smith for baking) grated or shredded into thin strips- I used a mandolin slicer to shred the apple
  • 1/2 tsp baking powder
  • 1/4 tsp salt
  • 1 cup milk or nut-milk of your choice
  • 1 snack cup size of apple sauce (measures out to 1/4 cup and 2 tbsp if you’re not using apple sauce from snack cups)
  • 1/4 cup maple syrup
  • 1/4 c melted coconut oil
  • 1/4 cup pumpkin seeds or nut of your choice (this measurement can totally be adjusted based on how much you want in the bars)


Apple Pumpkin Bars

Directions:

  • Preheat the oven to 350 and prepare a small to medium baking dish with some non stick spray. An 8×8 dish is a great standard size. Mine was more of a 10×7 but I don’t think it makes much of a difference. I follow the goldilocks rule…not too big and not too small. 😉
  • Mix the dry oats, cinnamon, baking powder, and salt together in a medium bowl.
  • In another bowl mix together the wet ingredients (milk, apple sauce, maple syrup, shredded apple, and coconut oil). *Here’s a tip, don’t let the wet mixture sit for too long or else the cold milk will harden the melted coconut oil. Learned that the hard way.*
  • Slowly combine the wet ingredients into the dry ingredients and stir until it’s an even mixture.
  • At this point add any nuts/seeds or other fun additions you might like. I used pumpkin seeds and they were delicious!
  • Pour the mixture into the baking dish and pop that baby in the oven for 35-40 minutes.

Here are some ways you can change it up to meet your taste preferences or dietary needs…

  • If you aren’t into maple syrup you can substitute any sweetener of your choice. I would stick with a liquid though or it might throw off the consistency, but HEY you might come up with an even better recipe in the process! Or try varying the amounts if you prefer to not have the bars too sweet, switch out the maple syrup for another serving of apple sauce. Just experiment!
  • Maybe pumpkin seeds aren’t your thing, if so some great options are walnuts and pecans.
  • You can even get really adventurous and put some dried cranberries in here too.


Enjoy!!!!


Golden Turmeric Milk Recipe

Golden Turmeric Milk Recipe

The Golden Turmeric Latte, or golden milk as it’s often called, has become a mainstay in the new wave of trendy wellness drinks. But turmeric actually has been around for centuries (like most things our society is re-discovering) and is used for it’s anti-inflammatory properties (oh yay, more new wave trendy wellness buzz words).

Why drink golden turmeric milk?

  • Curcumin (the active component in turmeric) = antioxidant
  • Cinnamon and ginger =  also antioxidants
  • These anti-inflammatory effects may reduce joint pain from osteoarthritis and rheumatoid arthritis.
  • Curcumin may increase levels of brain-derived neurotrophic factor (BDNF) which is a compound that helps your brain form new connections and promotes the growth of brain cells.
  • Curcumin has also been shown to have similar effects to antidepressants.
  • Cinnamon, ginger, and turmeric have all been linked to a lower risk of heart disease and lower blood sugar levels.
  • Curcumin has antibacterial, antiviral, and antifungal properties which may help prevent and fight infections.
  • Turmeric may help reduce indigestion symptoms.

Golden Turmeric Milk recipe

* I want to note that if any ingredients or amounts don’t feel right for you, or just aren’t your thing, this recipe is really modifiable, and most of the time I don’t even use a recipe. This is a guideline, play around with different versions. 

Ingredients:

  • Turmeric
  • Cinnamon
  • Ginger
  • Cardamom (optional)
  • Nutmeg (optional)
  • Clove (optional)
  • Honey, vanilla extract (or  any sweetener of your choice)
  • Milk (cows, almond, coconut…any milk will do)

I added a variety of spices but don’t feel like you have to use them all. I generally use some variation of the above spices (always including turmeric, ’cause it wouldn’t be turmeric milk if I didn’t!). If you want to start out simple then turmeric, cinnamon, and ginger are the best way to go. If you want to add one of the optional spices, I suggest you add it at the end by just giving the spice jar a shake or two and go on taste.

The only measurements you need to know…

  • 1 cup milk
  • 1 tsp honey
  • 1/2 teaspoon of  turmeric

That is the most basic version of the recipe. Start there, then add in the cinnamon and ginger by giving it a few shakes at a time, letting your taste buds be your guide.

Directions:

  • Heat 1 cup of your preferred milk in a small saucepan over medium/low heat (don’t bring to a boil).
  • Stir in honey and spices and let warm up for about 5 minutes
  • Stir occasionally so the spices incorporate.
  • Taste as you go, and feel free to add some cinnamon and ginger. Don’t worry about not using measurements, a shake or two at a time will do the trick.

With all the recipes I share it’s my goal to give you not only recipes that are easily modifiable, but also recipes that don’t necessarily need strict measurements. I do this for two reasons:

  1. Anyone can follow a recipe, but what I love about cooking is developing the intuitive sense of putting together ingredients without a road map, and I want to inspire my readers to have the same intuitive approach.
  2. Strict recipes (aside from baking obvi) are somewhat off putting because if you’re missing one little ingredient it feels like you can’t make it, and I want you to feel like you can make this recipe what what you have at home right now.

The best ingredients are the ones you have in your kitchen at this very moment. 

XO,

Caroline

Liked this? Pin it and share it with a girlfriend!